
Disclaimer: All guides provided are generalized information for personal troubleshooting. None of which are certified by the respective part manufacturers. Any improper installation/removal, mishandling, or negligence on your part, will be counted as physical damage and therefore void your warranty. If you have at anytime concerns or wariness please contact our technician support.
All pictures provided may differ to your own system configurations and components.
Tech Tips Video: RAM issues testing and tips
To learn more about what is covered in your warranty please refer to the following articles:
CyberPowerPC Limited Warranty Policy
CyberPowerPC Ecommerce Limited Warranty Policy
Physical Memory Test
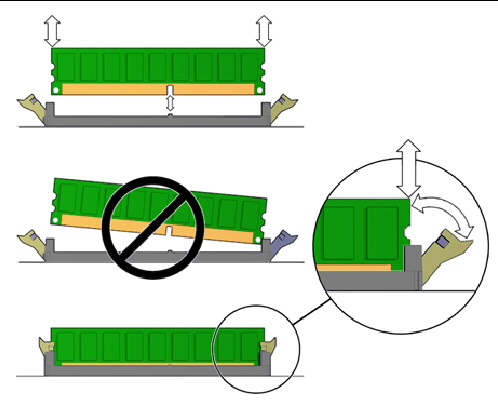
First is to ensure that your memory is seated properly. This means that the RAM sticks are flush against the slot with all contacts connected properly and the two clips for each RAM stick are locked. See below for an example of what proper seating looks like.
You might wonder, but this is a new computer or I've never touched the inside of this computer before, how could it be unseated. Sometimes during shipping, although rare, some jolt could have unlocked the memory causing it to slip out of place, or it may have loosened it and over time the natural tension of the RAM sticks eventually allowed it to pop out of place.
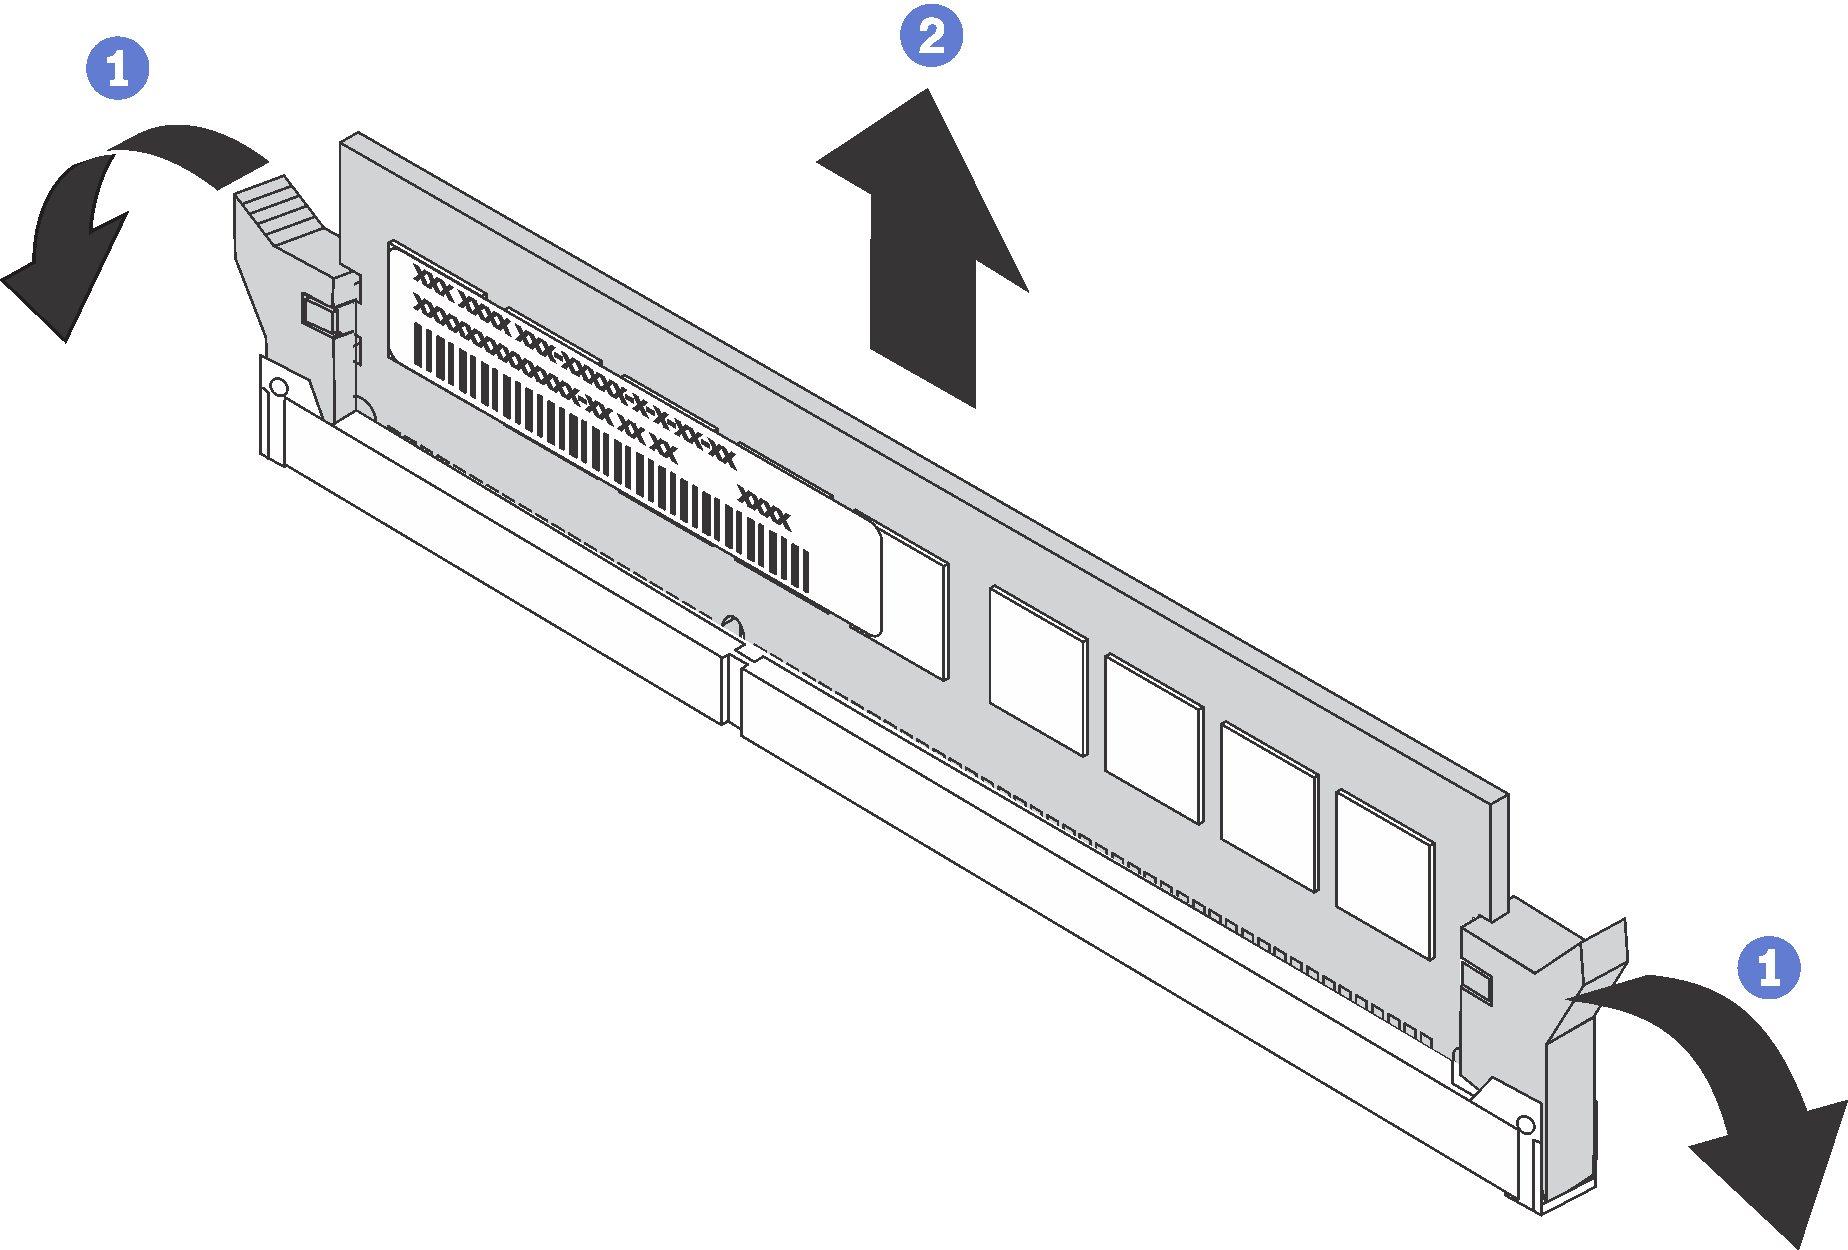
To REMOVE a RAM stick:
Follow the steps below to properly remove a RAM stick.
- Press the side clips down.
- The RAM will be unlocked and can be pulled directly out.
(Be careful to pull it out straight and parallel to the slot to avoid damage)
To INSTALL a RAM Stick:
Follow the steps below to properly install a RAM stick.
- Press the slide clips down to ensure they are in the open position
- Align the notch (dotted line) on the RAM stick to the slot and gently push down firmly on both ends of the memory stick until the clip closes up vertically to ensure that it is properly locked in place.

How to individually test each RAM stick
In some cases, if you've installed all the RAM and you are still having issues, the culprit could be one specific memory stick that is causing a total memory failure. To potentially help identify if a single RAM stick is having issues, you can check to see if the system will run without problems with only a single RAM stick at a time.
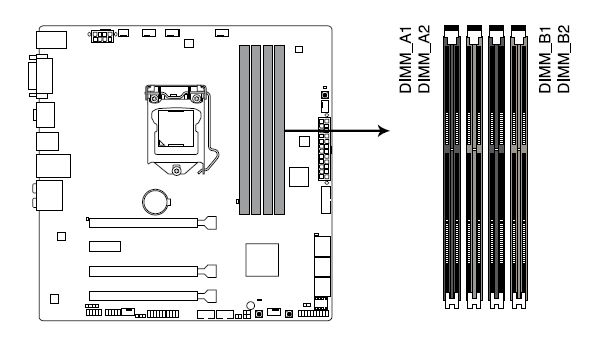
If your motherboard has only 4 memory slots
To do this simply follow the steps below.
- Remove all the RAM sticks on your motherboard
- Test 1 RAM in a single slot at a time and then repeat with other sticks in the same slot.
- If no errors are present it may point to a motherboard slot issue.
- You can try testing the slots by testing with a known good RAM stick on a different slot and testing different RAM sticks in that slot.
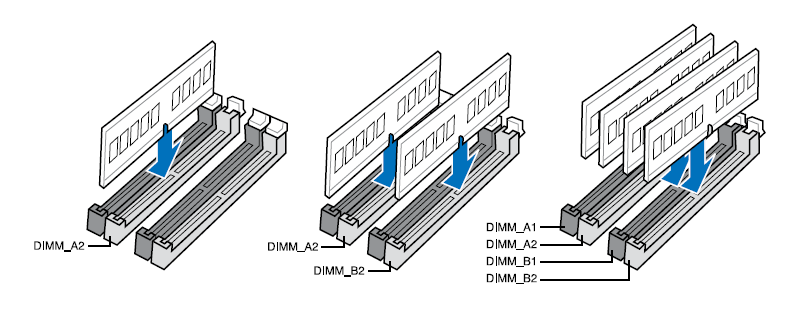
When reinstalling memory in a 4 memory slot motherboard, keep in mind that it must follow the following configurations below based on the number of memory sticks you are using.
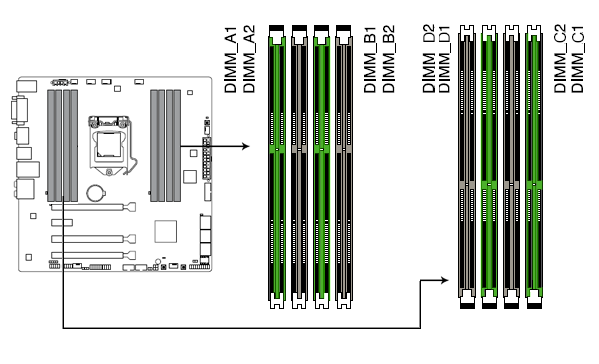
If your motherboard has 8 memory slots
To do this follow the steps below
- Remove all the RAM sticks on your motherboard
- Test 1 RAM in a single GREEN slot at a time (look for the markings DIMM_A1, DIMM_B1, DIMM_D1, DIMM_C1) then repeat with other sticks in the same slot.
- If no errors are present it may point to a motherboard slot issue.
- You can try testing the slots by testing with a known good RAM stick on a different slot and testing different RAM sticks in that slot.
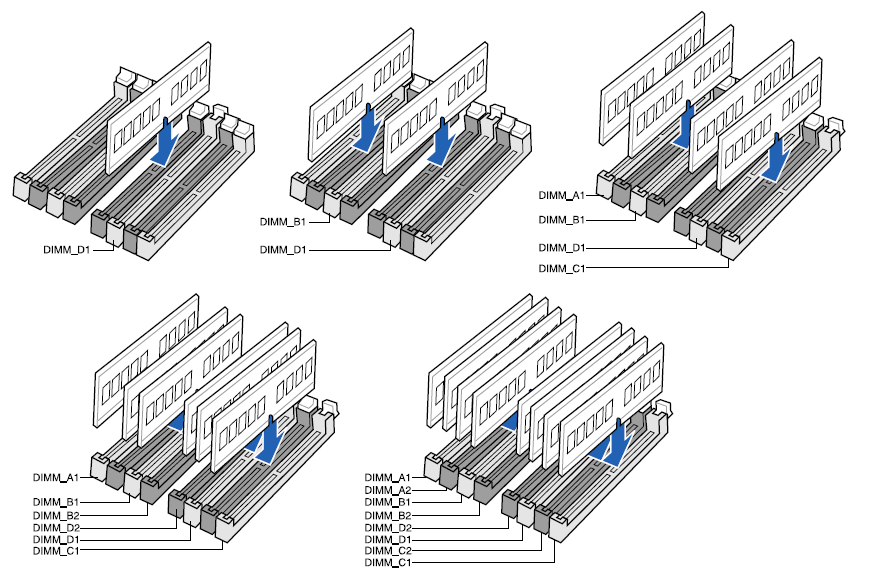
When reinstalling memory in an 8 memory slot motherboard, keep in mind that it must follow the following configurations below based on the number of memory sticks you are using.
Comments
0 comments
Article is closed for comments.